Data Engineering Lab 02 – Working with Apache Airflow
In this lab, we will use Apache Airflow to create and run a simple pipeline. Apache Airflow is similar to NiFi, but focused on programming pipelines. Airflow is more popular than NiFi.
Docker Compose
Apache Airflow provides a Docker compose file for us to use. Perform the following steps:
-
In Visual Studio Code (or similar), open a new folder to work in. Create a file called `docker-compose.yml.
-
Go to Running Airflow in Docker — Airflow Documentation. Here you will find a link to a Docker compose file, likely under a heading Fetching
docker-compose.yaml. Don’t worry about usingcurl- there is a direct link on the page. Copy and paste the text from the link into yourdocker-compose.ymlfile. For reference, the link as of writing is https://airflow.apache.org/docs/apache-airflow/2.5.1/docker-compose.yaml. -
Create another file in the same folder as
docker-compose.ymlcalled.env(yes there is a dot at the start of the file name). Make the contents as follows:AIRFLOW_UID=50000. -
Make sure you have saved the files. Then, open a terminal and use
docker compose up airflow init. This will initialise the databases and other services used by Airflow. It might take a few minutes to set up. -
Once finished, run
docker compose upto run the full Airflow system.
Logging into Airflow
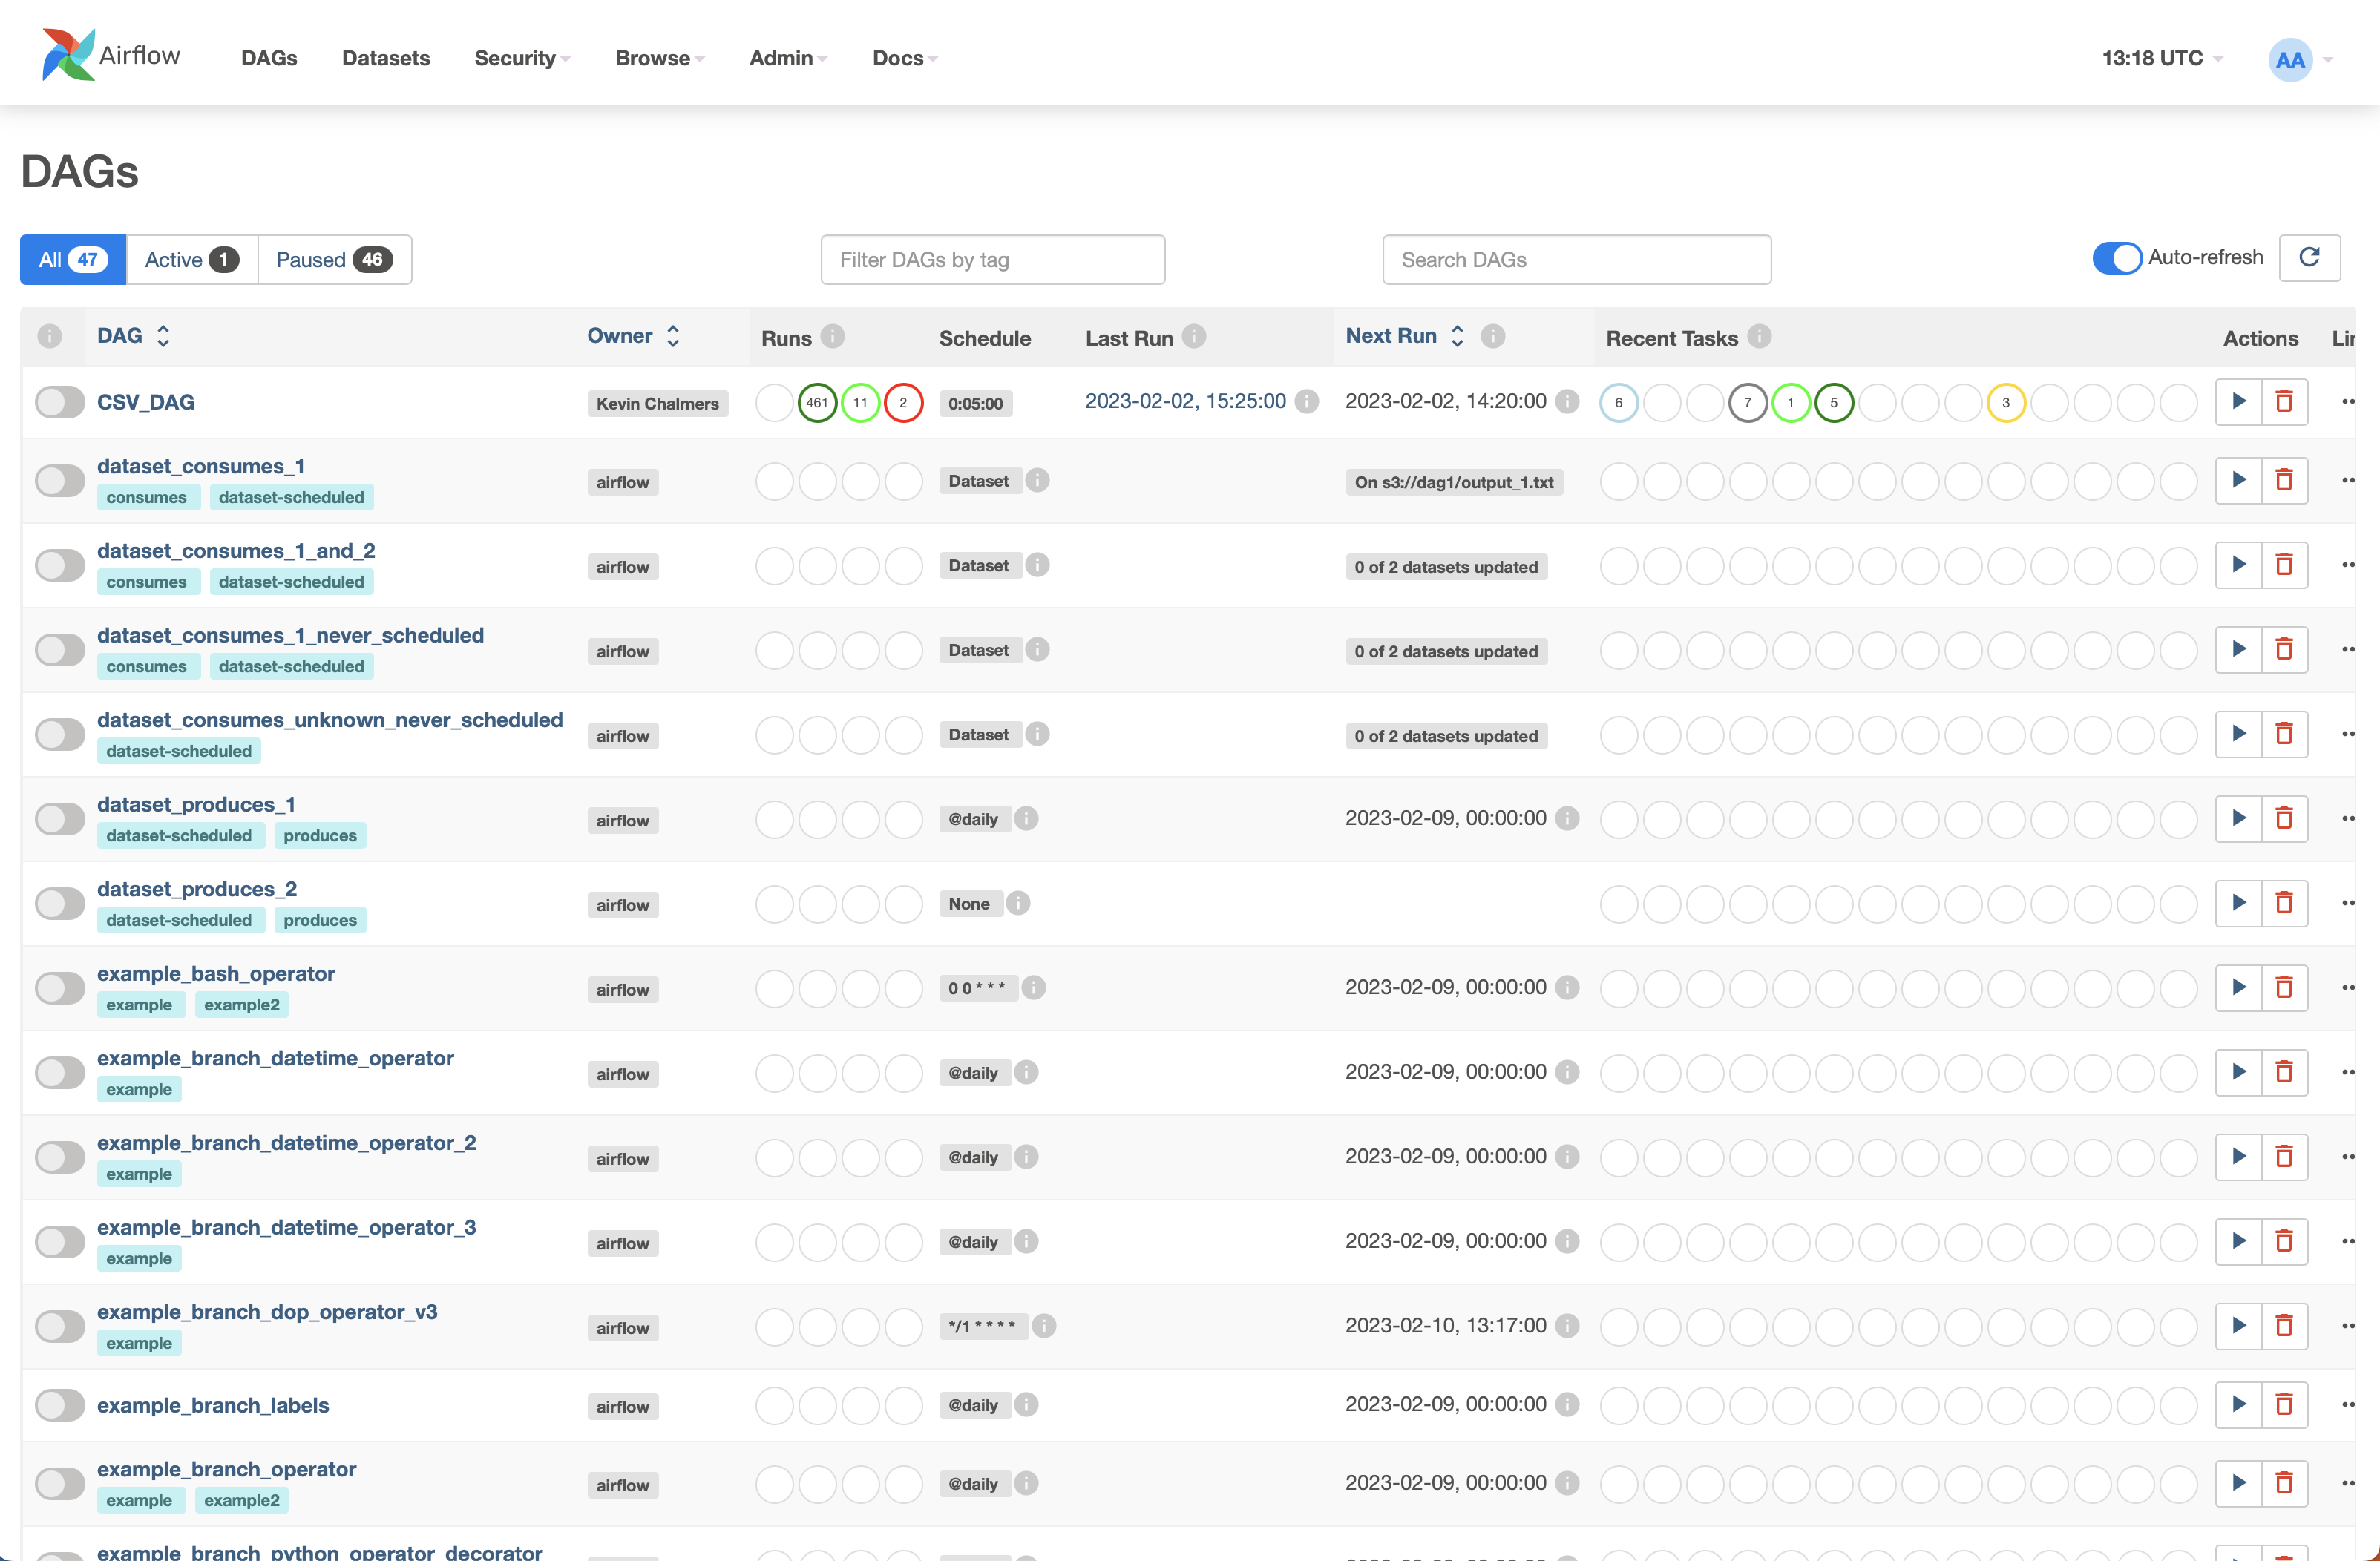
Once Airflow has started, you can log in by going to http://localhost:8080. You will be asked for a user name and password, which are airflow and airflow. You will be presented with the following screen:

This is the Apache Airflow dashboard, and it shows you all the DAGs that are currently available, as well as their status.
What is a DAG?
A DAG is a Directed Acyclic Graph – in other words, a graph (node-link) that has directionality (things flow from one node to the next) and has no cycles (you cannot loop back on yourself). A DAG is a pipeline with data flowing through it, possibly branching out and coming back. We will look at a DAG example soon.
Creating a DAG
In Visual Studio Code, you will see that some folders were created when you started Airflow. They should be:
-
dags -
logs -
plugins
Let us add our own DAG. Add a file to the dags folder called test.py with the following content.
from datetime import datetime, timedelta
from textwrap import dedent

from airflow import DAG

from airflow.operators.bash import BashOperator
with DAG(
    "my-first-dag",
    default_args={
        "depends_on_past": False,
        "email": ["kevin@kevin.com"],
        "email_on_failure": False,
        "email_on_rety": False,
        "retries": 1,
        "retry_delay": timedelta(minutes=5),
    },
    description="A simple tutorial DAG",
    schedule=timedelta(days=1),
    start_date=datetime(2023, 2, 1),
    catchup=False,
    tags=["example"],
) as dag:
    t1 = BashOperator(
        task_id="print_date",
        bash_command="date"
    )
    t2 = BashOperator(
        task_id="sleep",
        depends_on_past=False,
        bash_command="sleep 5",
        retries=3,
    )
    templated_command = dedent(
        """

        """
    )
    t3 = BashOperator(
        task_id="templated",
        depends_on_past=False,
        bash_command=templated_command
    )

    t1 >> [t2, t3]
The content of this Python code was explained in class, although you can probably work out most of the content. Save the file. This should cause Airflow to build the file. A folder called __pycache__ will appear in the dags folder.
We can now run the DAG. Back at the Airflow dashboard (you may have to refresh the screen) and find my-first-dag and turn it on:

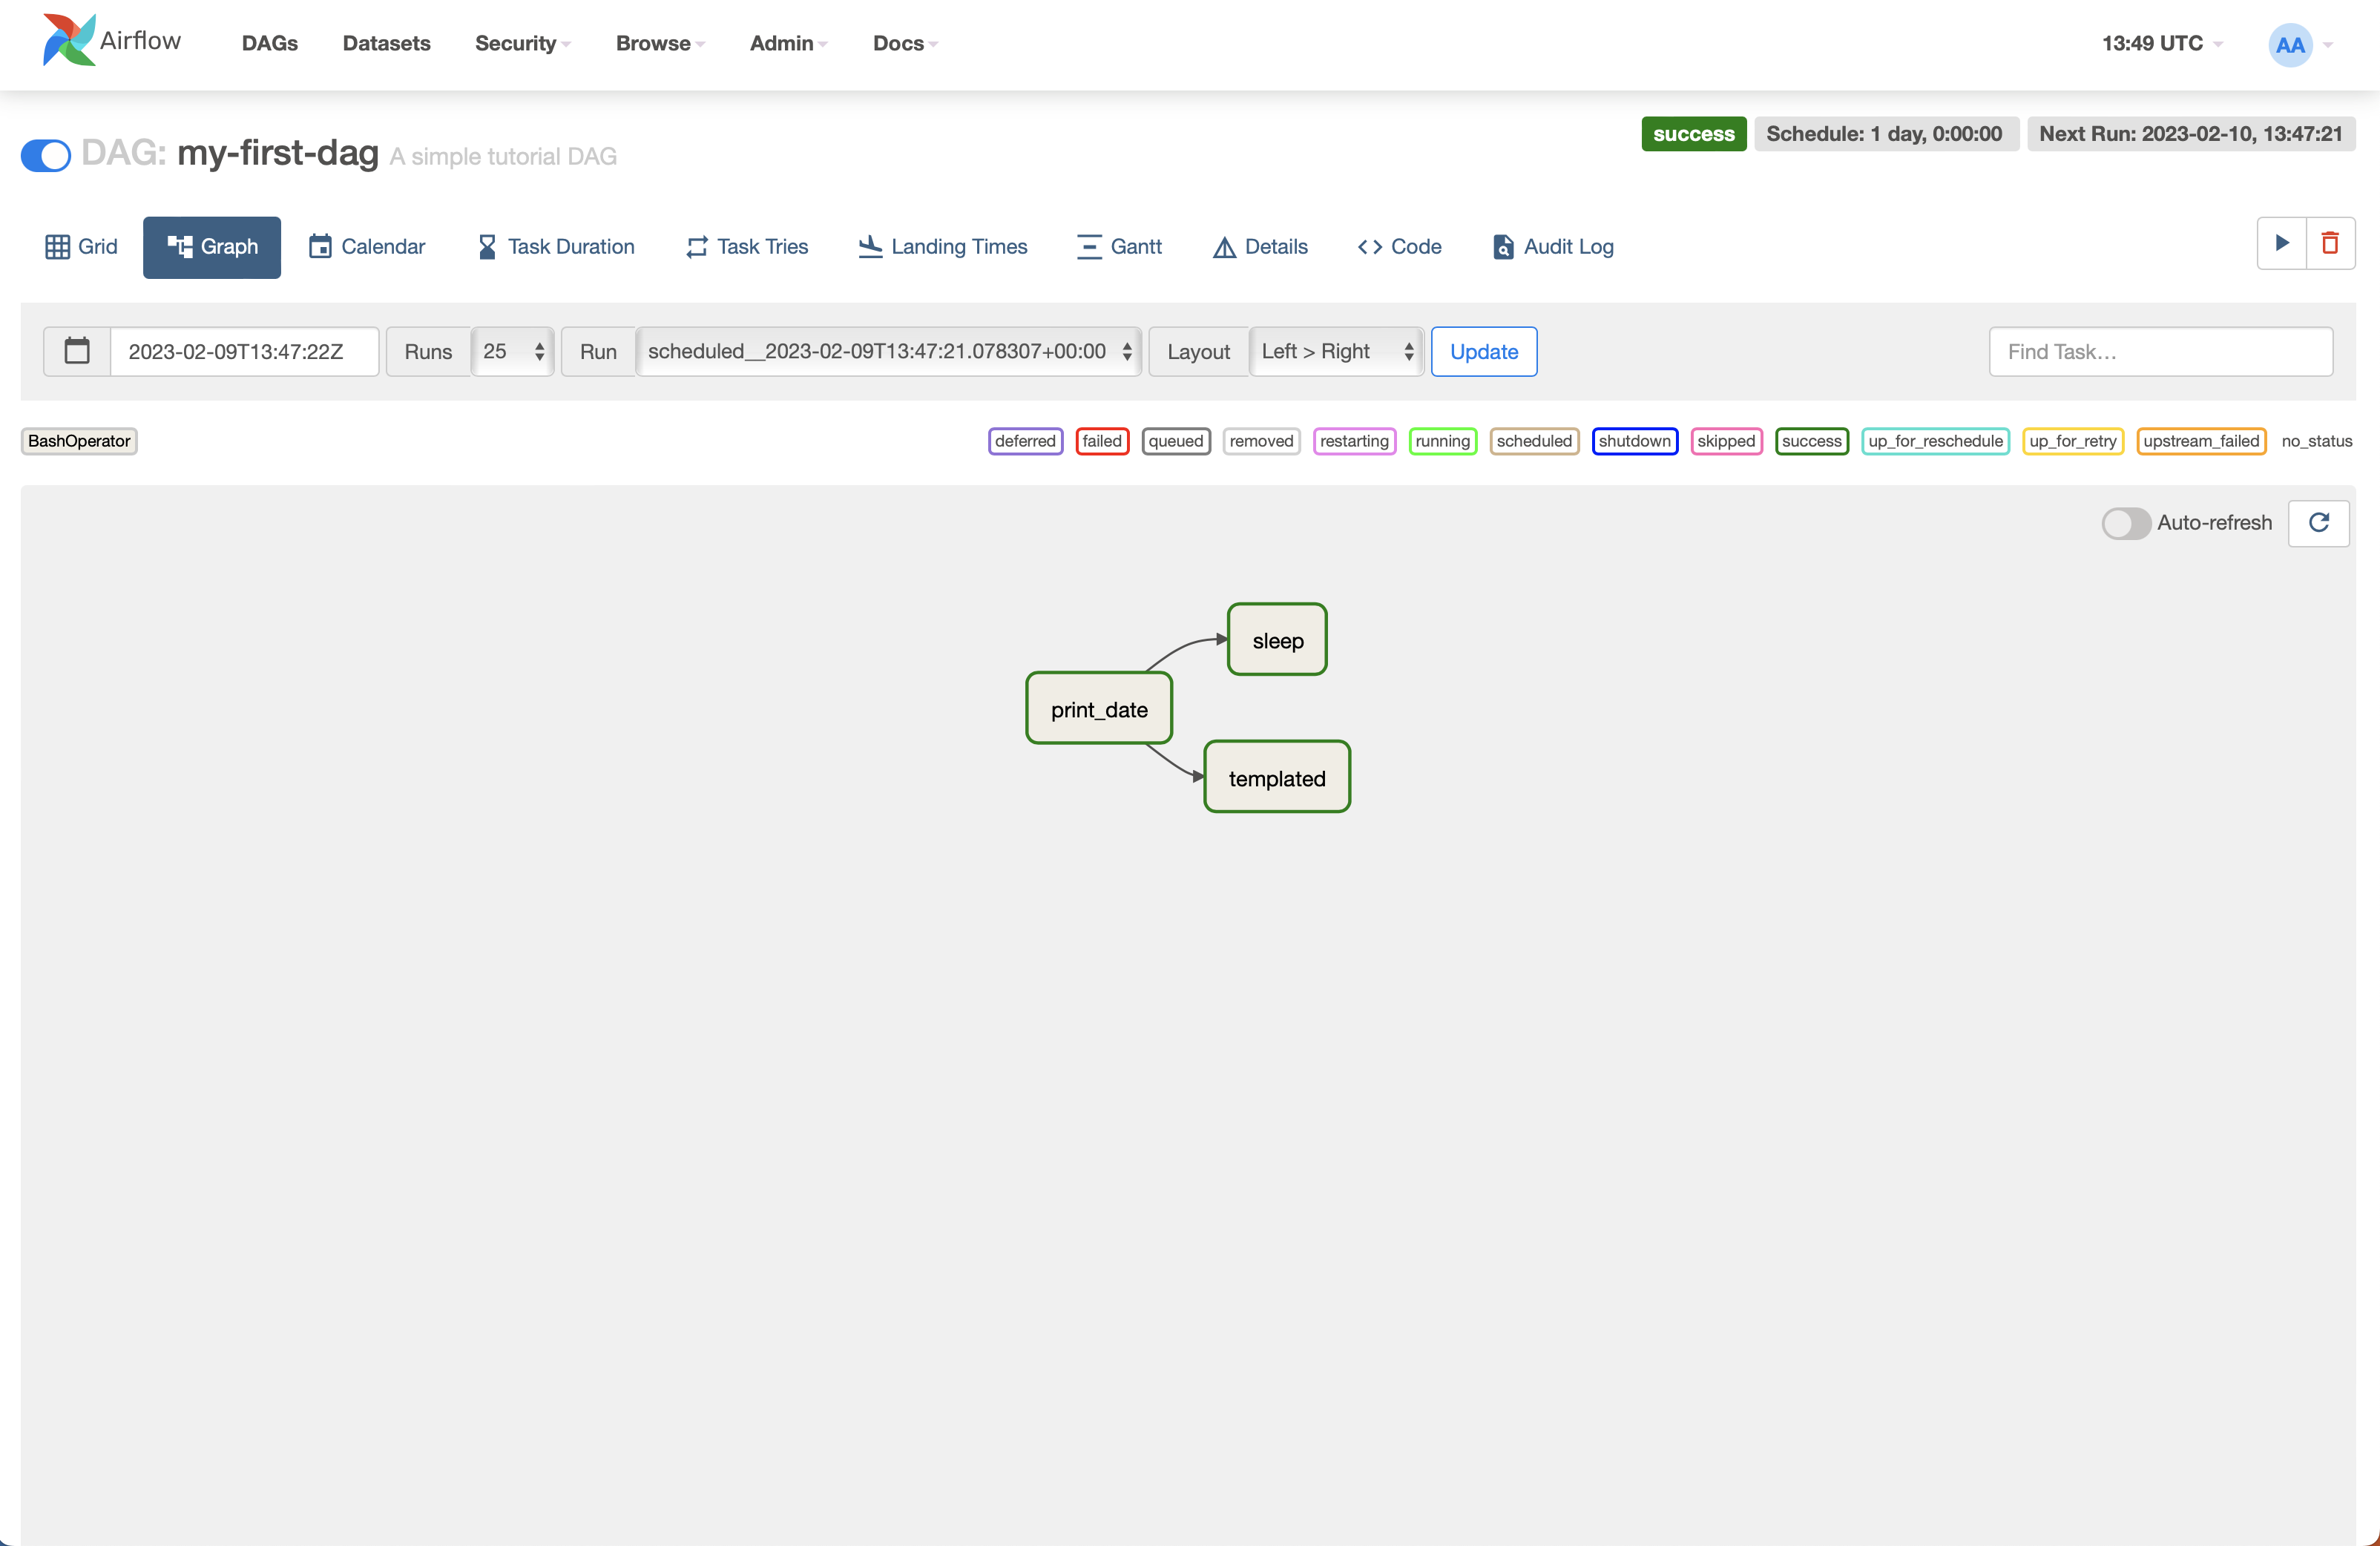
Click on the my-first-dag link and select the Graph view to see the DAG (pipeline) you created. Try and match this with your code.

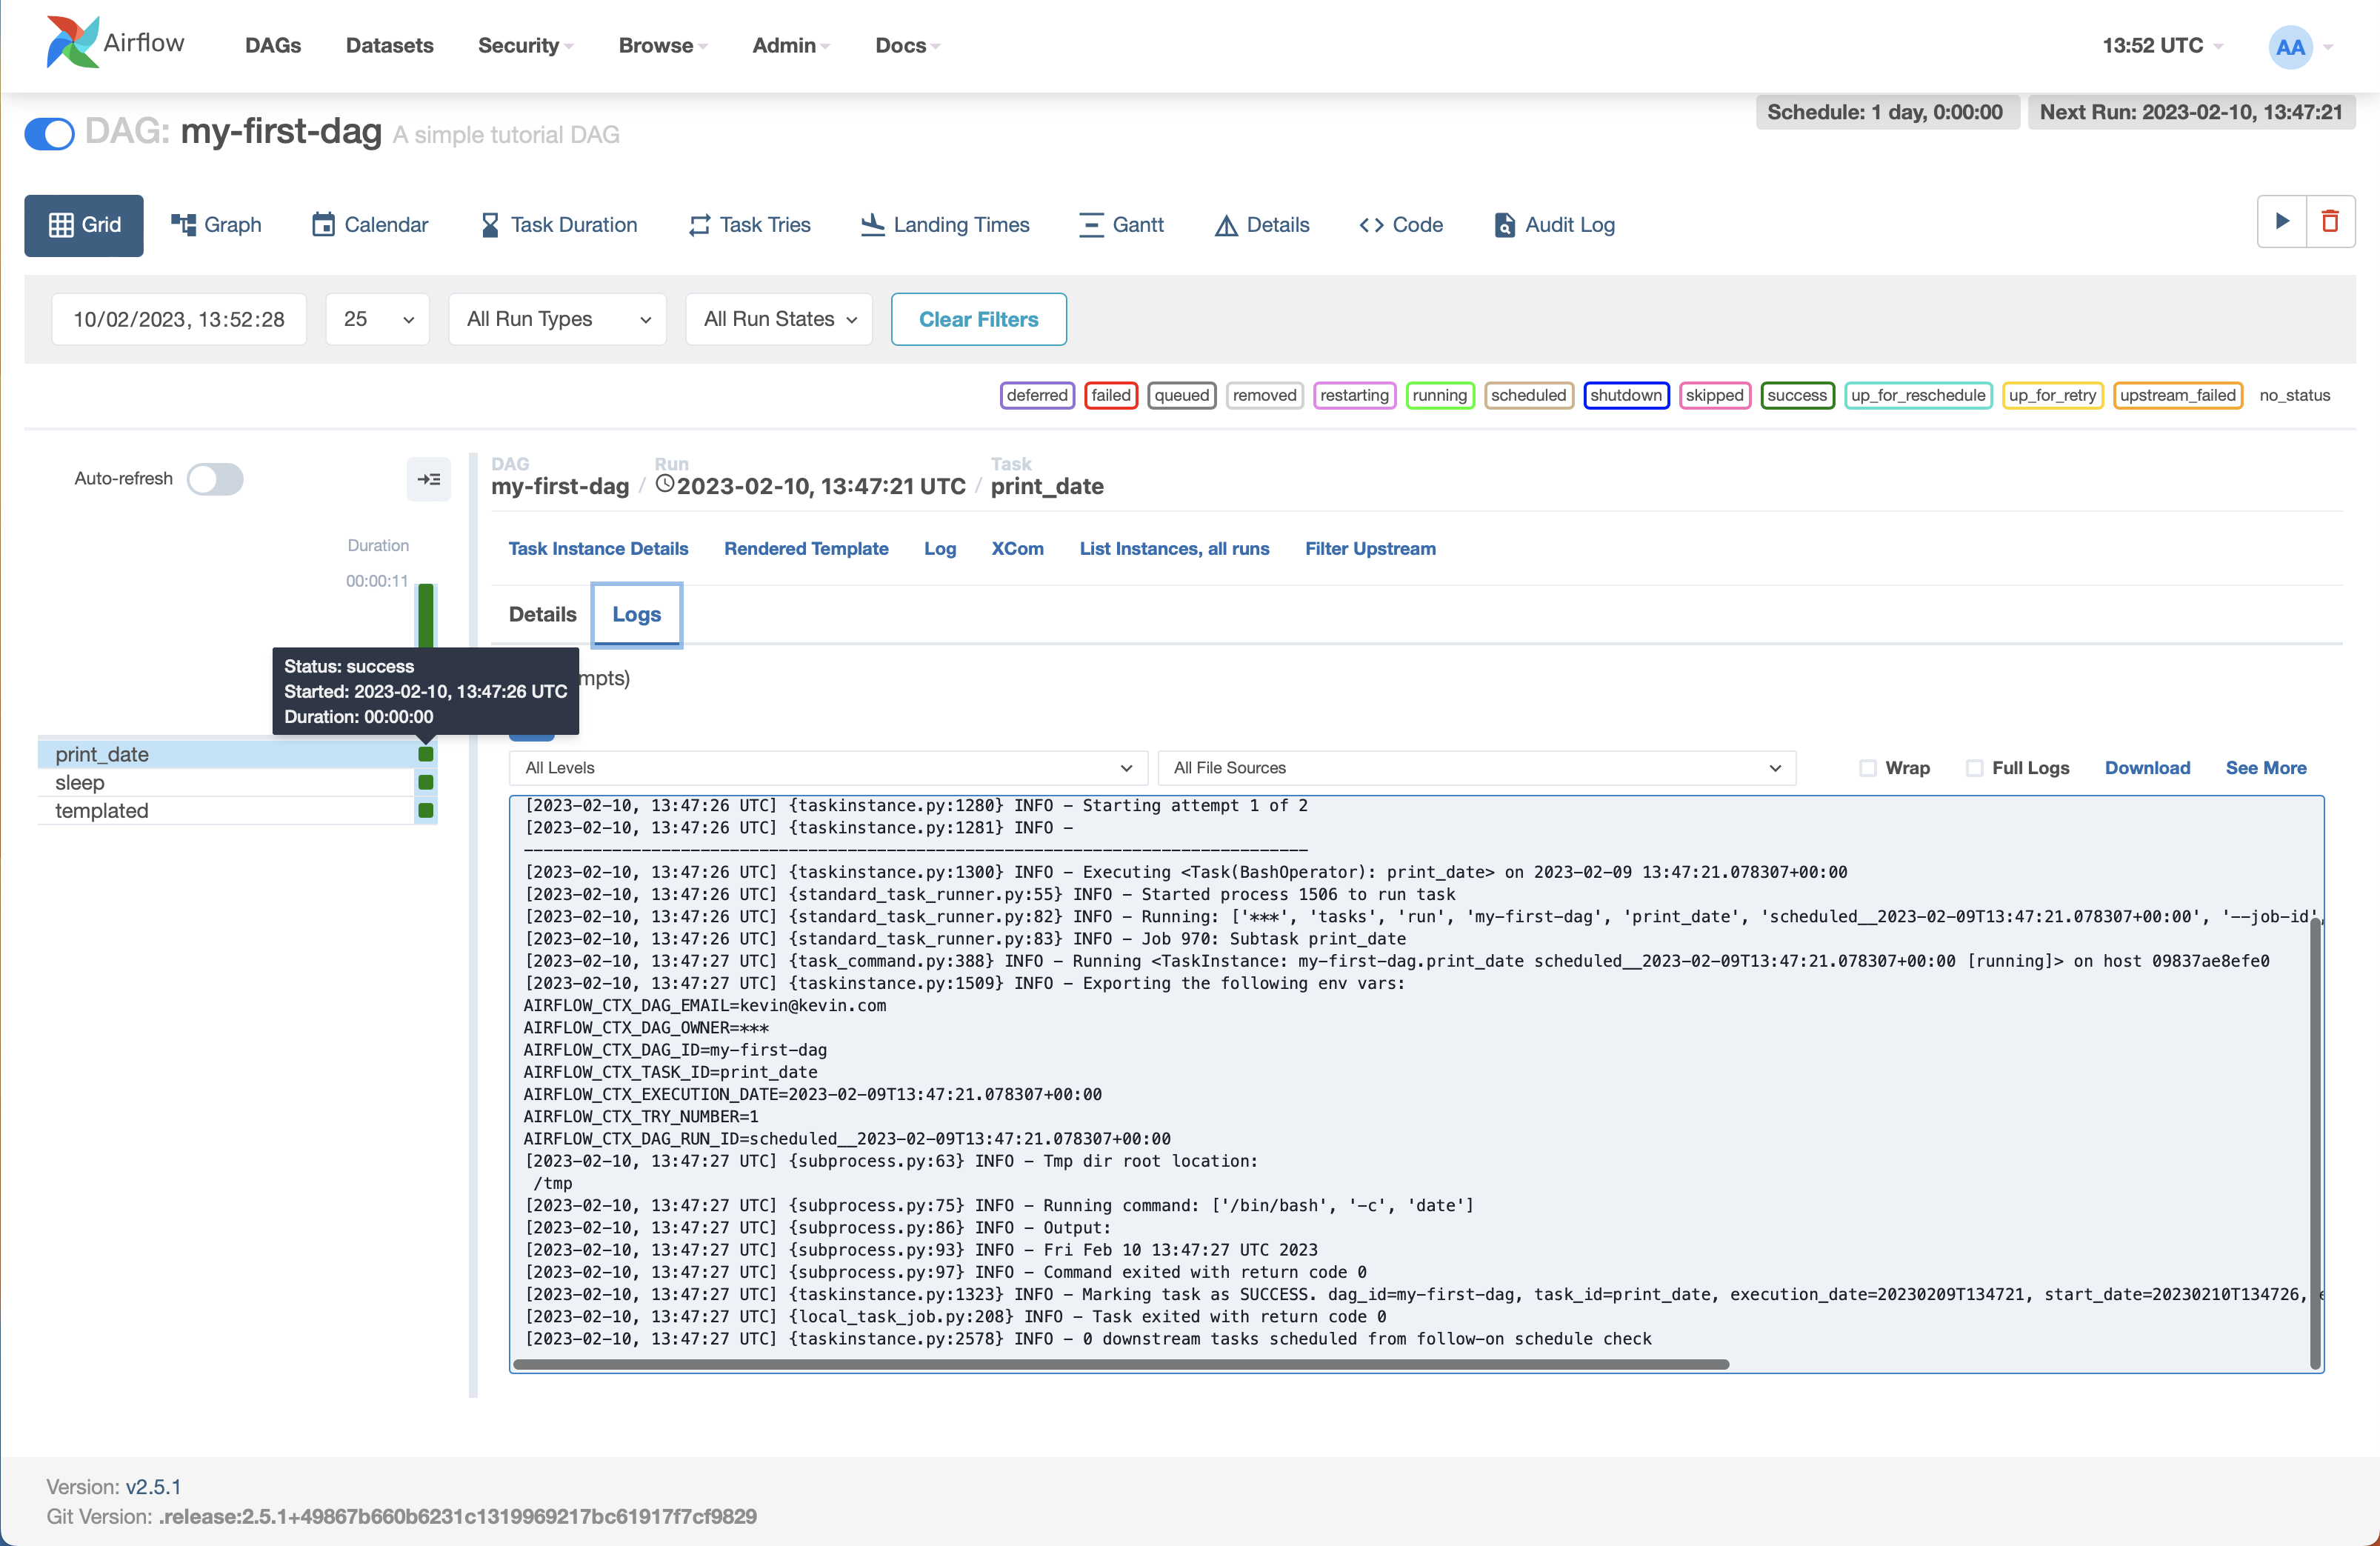
If you click on the Grid view, you can see the information from an individual run by clicking on one of the boxes on the left and selecting Logs:

Notice that the command ran the date command on the system as requested.
Creating a Better DAG
Let’s create a DAG that manipulates data. First, we will generate some fake data using Faker. First, stop the Airflow system by using control-C in the terminal.
In Visual Studio Code, create a new file called csv-gen.py in the main folder (not the dags folder) and use the following content:
from faker import Faker
import csv
output=open('data.csv', 'w')
fake=Faker()
header=['name','age','street','city','state','zip','lng','lat']
mywriter=csv.writer(output)
mywriter.writerow(header)
for r in range(1000):
    mywriter.writerow([
        fake.name(),
        fake.random_int(min=18, max=80, step=1),
        fake.street_address(),
        fake.city(),
        fake.state(),
        fake.zipcode(),
        fake.longitude(),
        fake.latitude()
    ])
output.close()
In the terminal, install the Faker library as follows:
-
Windows –
py -m pip install faker -
MacOS –
pip3 install faker -
Linux – either as MacOS or
pip install faker
You can now run the file using either py csv-gen.py (Windows) or python3 csv-gen.py (MacOS). This will generate a file called data.csv.
We need to give Airflow access to this data. Update the docker-compose.yml file to add the following line.
- ${AIRFLOW_PROJ_DIR:-.}/data:/home/airflow/data
You will find other lines that start ${AIRFLOW_PROJ_DIR:-.}. It goes right after those.
Now restart your Airflow system using docker compose up in the terminal. Once Airflow runs again, a new folder – data – should have been created. Copy the data.csv file into this folder.
Now we can create a new DAG using the following code:
import datetime as dt
from datetime import timedelta

from airflow import DAG
from airflow.operators.bash_operator import BashOperator
from airflow.operators.python_operator import PythonOperator

import pandas as pd

def CSVToJson():
    df=pd.read_csv('/home/airflow/data/data.csv')
    for i,r in df.iterrows():
        print(r['name'])
    df.to_json('fromAirflow.JSON', orient='records')

default_args = {
    'owner': 'Kevin Chalmers',
    'start_date': dt.datetime(2023, 2, 1),
    'retries': 1,
    'retry_delay': dt.timedelta(minutes=5),
}

with DAG(
    'CSV_DAG',
    default_args=default_args,
    schedule_interval=timedelta(minutes=5)
) as dag:
    print_starting = BashOperator(
        task_id="starting",
        bash_command='echo "Reading data"'
    )
    CSVJson = PythonOperator(
        task_id='convertCSVToJson',
        python_callable=CSVToJson
    )
    print_starting >> CSVJson
Which you should be able to run and test.